

 VALORANT
How to Activate Riot Mobile MFA For VALORANT: 2026 Guide
Here’s how to activate Riot Mobile MFA for your VALORANT account in 2026, so you can get back to playing Ranked.
4 Oct 20262 min
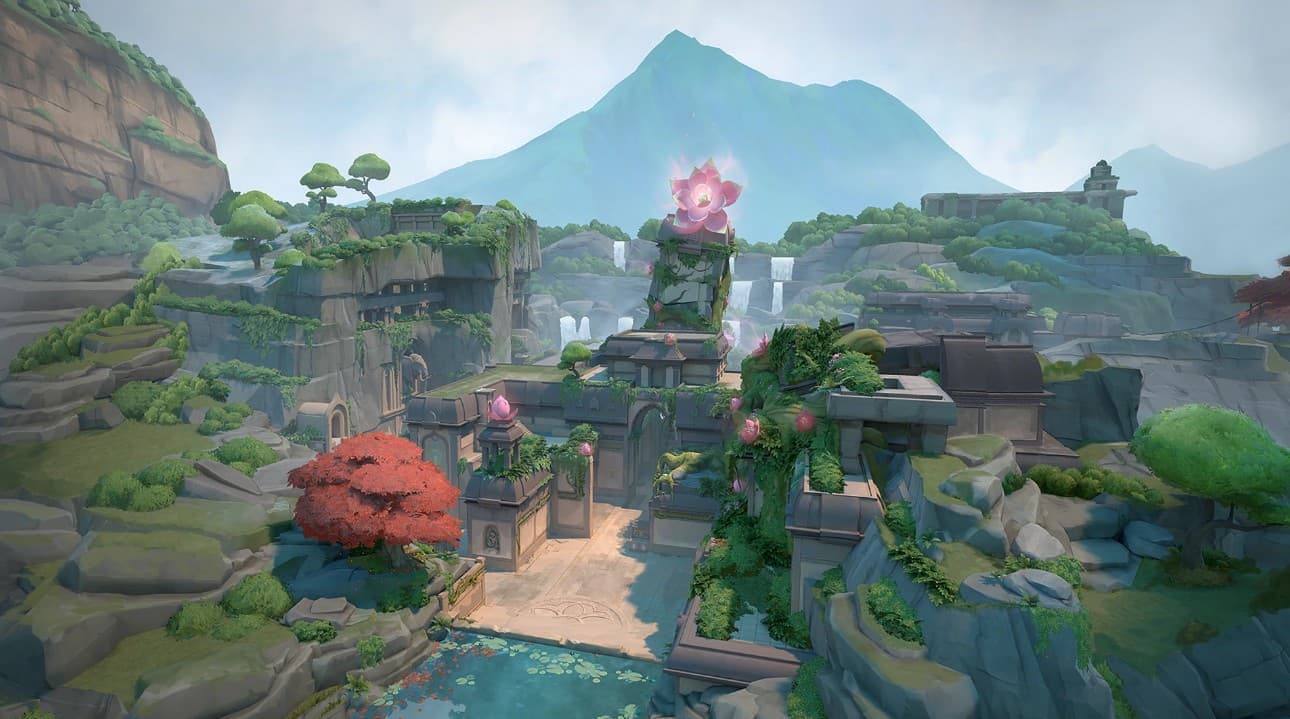
VALORANT’s Lotus map has two rotating doors, quick rotate pathways, and three sites. Image Credits: Riot Games
Here’s a guide to everything you need to know about Lotus, one of VALORANT’s most unique maps. Today, we’ll walk through the best Agents, all callouts, plant spots, pro tips, and key theory. Let’s dive in.
Lotus is unique among VALORANT maps for its compact design, countless rat corners, and narrow corridors. It also notably has three plant sites, several rotating doors, breakable pathways, and narrow choke points.
The most important concepts on Lotus are utility use, map control, and rotation. In this guide, we’ll explain core Lotus theory, which Agents are the best on every role and why, and how to win in your Ranked games. If you’re looking to skip to a specific section, no worries: you can use the Table of Contents bar on the right side of the site. Now, let’s lock in!

Notably, running double Sentinel on Lotus is decently common. If your team chooses this strat, it’s great to put one Senti on A and the other on C so it’s easy to pinch and retake B. Double Senti is uniquely useful on Attack here, too, since it helps deny flanks, opens up lurk potential, and stalls postplant retake util dumps.
You can also go double duelist, which is great for constantly re-clearing angles, fighting for space early, and retaking sites, or double Controller, which gives you tons of lurk potential and map control (most commonly with Omen and Viper).
Waylay and Raze are both great Duelists here, because they take space super quickly. We’ll explain why later, but having just a little bit of map space in Lotus creates huge impact, more so than on other maps. Raze’s Grenades and Waylay’s Stun also open up potential to fight for A Rubble and C Mound that Agents like Jett and Reyna just don’t have. Iso is fine to pick if you want. Phoenix is also fine in a pinch, especially because he has initiator-like abilities with his flash and Ultimate. Plus, you can’t go wrong with more postplant.
Because there are so many hard corners and narrow corridors, initiators like Fade and Skye are much better than Sova. It’s easy to get cover from his recon, and his drone is slow enough to avoid. Fade’s Prowlers and Skye’s dog are much better to rapidly clear long distances. Plus, Skye’s flash and Fade’s Sieze make them much more survivable and suited to taking duels. Breach is a fine pick here, and great for retakes. Gekko is pretty weak, although he’s a common pick. His flash is bad, especially for long distances. His one saving grace on Lotus is his Ult.

Omen is the lurk king, so he’s well suited to Lotus. His Ultimate, which is usually absolute dogwater (sorry, Omen!) can beat out even the fastest rotates and create key pinch opportunities. Plus, his Paranoia is broad enough to cover most of Lotus’ compact areas. If you can’t play Omen, Clove, Viper, Astra, and Brimstone are also fine. Viper rocks on this map, actually, and is great in double-controller comps. Brim ult is busted on this map since it’s so closed-in. You might have a hard time with Harbor, though.
Cypher and Chamber are busted on this map. Chamber is awesome for his fast TP, which lets him rotate quickly, aggressively take duels, and jump peek for info. He is more survivable and suited than other Sentis to play up for early info. Usually, he’ll hold A main or C mound aggressively. He can also play for his trip from Heaven on B. Vyse is another great pick, since her wall easily isolates a push and stops attackers from trading. She is equally effective on any site. In a pinch, KJ or Sage can also work. Sage players usually chill on A or C, while KJ is goated on C and B with the right setup. You’ll have a hard time on Deadlock, because slow lurks are so common that they make her sonic sensors obsolete, and her wall is poor for denying info.
Here’s a diagram image and a list of all callouts on VALORANT’s Lotus map.

Other callouts your teammates may use that don’t appear here include:

Lotus’ doors are the most important spots on the map. The team that controls the doors usually wins the game, and there’s theory behind this. The doors make rotating extremely fast, and they also grant a huge amount of map control by opening up sight lines between the sites.
These doors are:
This is why you might notice Defenders always playing up for contact in C main early. It’s important to deny the C mound space, or at least get info, because losing it gives attackers quick access to C and B.
(Another quick note about C mound: make sure to avoid getting downed by the common one-way smoke there.)
The B/A breakable door is especially great on Defender for helping defend against pushes, since it splits crosshair pressure on the person holding Stairs. Otherwise, this becomes what we call a funnel angle, where there’s a smaller and easier angle for enemies to hold than defenders. The Attackers in Rubble have a tiny amount of crosshair space where their opponent Stairs could be. Meanwhile, the Stairs Defender might have to make crazy flicks holding a wide range in Rubble.
Even after securing a site on Attack, you should fight for control of the door closest to you. On C, this means having someone play Mound to defend against flank and hold for the rotating door. On A, this means potentially having someone lurked up to the breakable door boxes and holding, or maintaining that sight line.
We explained why fighting C mound is so important, but A Rubble is another key area of territory. The choke point behind it is narrow and much easier to hold than the main A entryway. If just one player on the Defending team can push up and take rubble control, they singlehandedly deny access to B door, Tree room, and Stairs. This cuts off nearly half of the map’s space, is extremely efficient, and creates huge pressure that deters a B push, since it guarantees at least one side can pinch on the retake. Since it’s so common for teams to rotate before committing to a push, too, an A rubble lurk can catch rotaters unaware and get easy picks.

Because A’s first choke point is so narrow and the space is so important, it’s super common for Defenders to dump long-range utility early. Typically, they combine one ability that restricts movement and another that does damage for an AOE burst.
When Lotus first came out, Raze and Fade playing together on A was the meta since they could throw Fade’s Sieze and Raze’s Grenade at the entryway for easy kills. We called this the Sieze/Nade combo. Now, it’s broadened a little bit. Sometimes we see Sage slowing and Phoenix throwing a molly, or sometimes Raze just goes sicko mode and drops an immediate Ult. Other times, Breach will immediately concuss and stun. Regardless, it’s super effective. Taking five seconds to play slow and avoid the round start util dump can save a lot of trouble for your team.
On the other side of the coin, Defenders can ruthlessly take advantage of this tactic. Even if you don’t have damage util, you can create pressure with an immediate Sova recon, a KAY/O knife, or aggressive smokes.
What we covered about rotations and the doors will help you understand Lotus’ B-Site theory. This plant site is extremely unique compared to the other two, and not every map has three plant options. B looks appealing for pushes, but it’s difficult to correctly put a site takeover into practice.
Because B is in the middle of all three sites, it’s the hardest to defend on a retake. Enemies who try to recapture territory will put pressure on the area from both sides. In addition, there is very little cover from flashes, meaning it’s easy to get caught in bad duels while holding your plant.

Taking A site or C site will generally be much easier than B. The times when you should push B are:
If you do choose to rush B, make sure you’re conscious of where you are planting. Some of your players should almost always go B main. Because B is so easy to pinch on retake, it’s also a good idea to try holding aggressive angles/taking space off site (especially if you have a numbers advantage).
On Attacker, late-lurking B main is busted. This is because, again, Lotus’ rotate pathways are among the best of any VALORANT map. Cutting directly through B site significantly reduces how long it takes to go from A to C. Many Defenders will make the mistake of running through the site without checking main, and a lurker holding B main (even if the entire rest of the team is on C) can easily make an impact and get a few kills.
Plus, if you don’t get frags, a mid lurk can still help keep enemies busy, buying time for your teammates and reducing the retake pressure they face on site. If you’re not feeling confident with your aim, this is a very easy way you can make an impact and maintain space for your team.
On the other side of the coin, don’t give up B site until the enemy team has committed to a push (initiator utility on a site, Duelists pushing, spike planted). Lurks are too frequent (and effective) to risk it.
You NEED to have audio cues to lurk B effectively. Turn your music off if you’re listening to it, and turn on HRTF. If you don’t want to fight the rotate, you can listen for footsteps and instead create a pinch by trailing behind the enemy team.
We already know the Jett named ‘I Miss Her’ has commitment issues, and in Lotus, you should too. In fact, we encourage you to explore your options before choosing just one site. This is obviously a universal concept, but it’s especially important here. If your gut tells you not to rush, it’s easy to rotate, and you don’t have to commit. Try to spend a few seconds just quietly playing for contact and gathering info before doing anything major. Some easy things you can do to get info include:

For example, say you’re preparing for a C push. You don’t see anyone holding mound, so your team lurks up. You hide from a Fade eye and let it disappear. At the choke point, you hear a Killjoy turret. Then, you hear footsteps coming through Waterfall.
This would tell you that at least 3 people are on site, and you know who two of them are. Especially if KJ was the enemy team’s only Sentinel, you could use that info to immediately open the door and flood B, where you have a more advantageous max 5v2 push (probably 5v1 since someone will usually anchor A) instead of a 5v3. Since util is so important on this map, you’ve just negated their Sentinel, made their Initiator waste abilities they could have used on retake, and preserved your own cooldowns to overwhelm on another site.
For this reason, you usually want to keep at least one rotate pathway open before fully committing. This could mean having someone lurked up B, or having a tripwire on A main. It just makes sense.
Similarly, you should always anchor on Defender until you know the enemy team is committing to a site. The Attackers’ goal is to get you to give up space too early, manipulating the odds to their advantage.
These are some signs you can look for to tell if the Attackers are probably going to commit:
If 2+ of these signs aren’t happening, the team isn’t necessarily committing. Even then, keep anchoring until a downed enemy drops the Spike, or the enemy team begins to plant. As you get to a higher MMR, it’s okay to trust your gut on this and not follow it exactly, but if you’re still learning in lower ranks, it’s good to keep this as a rule.
In VALORANT, there’s a concept called defaulting where teams spread out across the map and hold for Defenders to push into them. Remember how we said lurking is huge on both sides? Sometimes, Defenders will take it too far and push out of A main or B before they have any info. Defaulting is an easy way to punish them and create an immediate numbers advantage for the Attackers.
Defaulting is also important to know because it teaches you that seeing one or two people outside your site isn’t necessarily a push. That way, you won’t call for a rotate too early if you see just one dude chilling in C long.
We’ve covered a few VALORANT maps in the past where aim is an absolute win condition: for example, Abyss. However, Lotus is a map that is ‘VALORANT’ to its core, since utility use and game sense are arguably much more important factors in deciding your fate than your headshot percentage.
This isn’t to say there aren’t spots where strong aimers can make an impact: a couple long-range angles exist that are great for snipers. These are C mound and A stairs. However, they are few and far between, and ranked demons with stellar tracker scores often get frustrated by this map because they get beaten by players with much worse gunplay than them.
Lotus is compact, small, and full of corners. Your Initiator gameplay needs to be on point to clear everything. In addition, you’ll need to constantly re-clear space due to frequent rotates.
Many teams make the mistake of thinking more utility = better utility. This is not the case. Just make sure your utility is effective. Every piece of util should get you a) information, b) map space, or c) a kill.

Lotus’ plant sites are easy to get lost in, and there are many areas where you can tuck in and put the spike in a corner. Make sure you’re planting somewhere your teammates can actually hold the bomb. You also need to communicate and decide with your team before the push. For example, it’s way too common that someone plants Bend on C, only for the last person alive to be playing main and unable to do anything while the Defender defuses.
To help out, here’s an image where the best possible plant spots are highlighted in red. Typically, these are areas that don’t make it obvious where you’re holding from, and are accessible to multiple angles or easy to pinch.
Note: You can plant in the cubby corner on A-site, but it’s better if you’re in a 1v1 clutch situation and have heaven/drop control. It’s going to be hard to hold this from tree or rubble, and you might end up stuck looping enemies on site.
Since util dumps and lurks excel, teams are going to play for retake more often than some other maps. This means postplant util like KJ mollies, Astra pull, Brim ult, and others can be incredibly important (despite postplant agents not being common in high ELO and pro). If you’re an Agent who has postplant util, you should let your teammates take first contact as the Spike counts down. Similarly, if you’re a Duelist or Controller, play so enemies will enter duels with you before teammates who can guarantee a win by buying time.
There are a TON of wallbangable spots on Lotus. You should be prefiring and clearing every box as you push up, especially:
Hopefully, this made you feel a bit more prepared and opened the Lotus doors to Ranked victory! Stay tuned for more VALORANT news.
VALORANTHere’s how to activate Riot Mobile MFA for your VALORANT account in 2026, so you can get back to playing Ranked.
 VALORANT
Here’s an up-to-date list explaining all VALORANT Ranked queue restrictions, based on party size, rank, and more.
 VALORANT
Here’s everything players need to know about VALORANT’s Ranked mode, including a list of all ranks and party restrictions.